 |
 |
 |
 |
And this is the finished resolved sample:
 | 23.1 |
The design was made up of 4 separate paper pieces and I thought that rather than doing one piece, joining up the sections, the finished resolved sample could be constructed of four separate squares linked together by some means. I had envisaged that it might be difficult to join areas of different textures so by leaving the sections separate this would reduce the problems.
The idea of the resolved sample is to produce some work which contains much texture. Each panel has an area of low relief texture adjacent to a high relief area. Over each low relief area there is a raised patch which extends over the border of the panel and which contains extreme texture.
Panel 1
 | 23.2 |
 | 23.3 |
23.2 For the background surface scraps of organza, netting, scrim and dish cloth material was tacked to some cotton fabric. The fabric was sewn into tucks and then machine stitched across the tucks so that they were flattened in wavy patterns. The tucks were then oversewn using thick cotton thread. This embroidery covers half the area, across the diagonal.
 | 23.4 |
23.4 The high relief area is made from gathered tucks in cotton fabric. Two long, narrow strips of fabric were cut and two inch tucks were made at regular intervals. The two strips of fabric were placed wrong sides together and pinned in place. Then, gathering stitches were sewn from top to bottom at intervals along each tuck and along the spaces between each tuck. The top edge was neatened with blanket stitch. Then the gathering threads were pulled tight and fastened off. This gave a 3D shape which was stitched on the backing fabric, curling it into the required shapes.
 |  |
| 23.5 | 23.6 |
23.5 & 23.6 Diagram showing construction of gathered tucks and tucks before stitching down on to background.
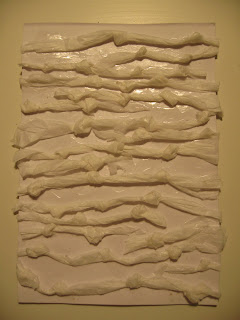
Source material for panel 1
 |  |
Panel 2
 | 23.7 |
 | 23.8 |
23.8 The background fabric was divided into two diagonally. One half was stitched with large fly stitches using a strip of dish cloth fabric. The stitched area was covered with a very fine cotton which had been embroidered with very fine fly stitches and some netting. The layers were quilted around the outline of the fly stitches. Scraps of fabric were scattered on the other half of the piece and stitched down using perle cotton thread.
 | 23.9 |
23.9 The high relief area was made by making eight tucks in a length of fabric - 4 long and 4 short. The ends of the fabric was joined to make a ring. Each tuck was stitched with gathering threads and the top edge neatened with blanket stitch. The gathering threads were drawn up and tied off. If a long length of fabric is initially tucked then several pieces can be cut from it in the manner of strip patchwork. The pieces were arranged on one half of the backing fabric and stitched down.
 |  |
| 23.10 | 23.11 |
23.10 & 23.11 Tucked fabric before cutting into narrower strips and diagram showing construction.
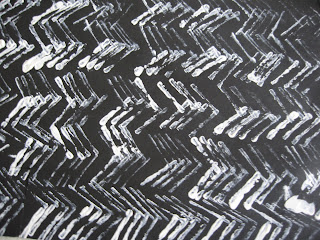
Source material for panel 2.
 |  |
Panel 3
 | 23.12 |
 | 23.13 |
23.13 The background was made by scattering scraps of various fabric on to cotton fabric and tacking them down. Fine tucks were then stitched into the fabric. Bobbles were stitched onto the tucks by building up layers of detached chain stitch, stitched diagonally over the tucks.
 | 23.14 |
23.14 The high relief area was made using the same method described for panel 1.
Source materials for panel 3.
 |  |
Panel 4
 | 23.15 |
 | 23.16 |
23.16 The background was made by stitching wool using a twin needle onto dish cloth fabric in a trellis pattern. This was then cut into small pieces so that each pece had a "V" shape of wool on it. These pieces were then stitched sown on to a backing fabric. The backing fabric was then embroidered with large detached fly stitches using a strip of dish cloth fabric. Each stitch was wrapped using cotton tape and then outlined using a detatched chain stitch in cotton perle thread.
 | 23.17 |
23.17 The high relief area was made using the same method described for panel 1.
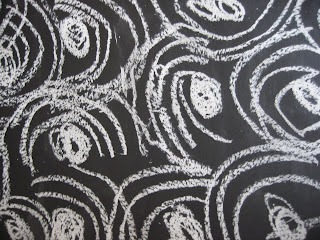
Source materials for panel 4
 |  |
Raised Areas
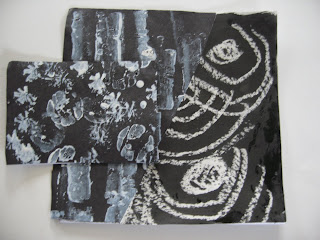
Each panel has a raised area which is essentially a platform supported on handmade beads. The content of the raised areas was based on this paper design:
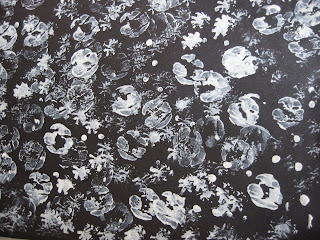
I decided to make this an extremely high relief area by making individual pieces and attaching them to white plastic coated wire so that they would stand upright. This was inspired by the study of Michael Brennand Wood. (See here) There are four different items on each raised area.
Circles of organza and netting stuffed with wadding and stitched onto a loop of wire.
Ovals of organza and netting and a piece of stiffened, gathered cotton fabric (See border for method for this) were threaded onto wire. Centre was a flat bead.
Nine tucks were made in a piece of fabric. The fabric was cut into strips. The ends of each strip were joined to form a ring. The fabric was then wrapped using a silky rayon thread. The piecess were threaded into wire with some frayed muslin and a flat bead.
The fourth type is a smaller version of the one above, made with six tucks.
23.18 to 23.25 - Pictures of raised areas.
 | 23.18 |
 | 23.19 |
 | 23.20 |
 | 23.21 |
 | 23.22 |
 | 23.23 |
 | 23.24 |
 | 23.25 |
 | 23.26 |
The base of the platform is a strip of pelmet vilene, padded with wadding and covered with organza. Two lengths of perle thread were threaded through to be used for attaching the piece to the background fabric. The threads were stitched down on top. Scraps of fabric were then scattered over the organza and stitched down. The wired pieces were wrapped around a length of painted kebab stick and the stick was stitched to the underside of each base. The wires were brought to the top of each base piece and stitched down. Four beads were made from rolling strips of pelment vilene. These were threaded onto the the attachment threads. See the making up section for details on how the raised areas were attached to the panels.
 | 23.27 |
 | 23.28 |
The border
I experimented with ideas for the border.
 | 23.29 |
23.29 From left to right:
- Layers of netting with strips of organza. Stitched with zig-zag pattern and cut close to stitching. Didn't look substantial enough.
- Cotton fabric was gathered gently. The fabric was then brushed with paverpol to stiffen and set the stitching. When dry it could be cut to shape, keeping the gathered effect.
- The fabric above cut to shape. This was the method I chose to use as the border.
- Three 1.5 inch tucks were made in cotton fabric spaced .25 inches apart. Each tuck was stitched with a gathering thread at .75 inch intervals along the length of each tuck. The edge of each tuck was finished with blanket stitch. The threads were gathered giving a scalloped effect. This made a nice firm, even edge but it was difficult to work out what to do at the corners.
- Strips of fine cotton tied in the centre to make a tassel. The tassel was spread out and brushed with paverpol to stiffen. Looked too dominant as a border
Making Up
Each of the four panels was made up in the same way.
The embroidery was tacked to a 13 cm square of pelmet vilene and the edges tucked under it. The raised areas were attached by threading beads made from pelmet vilene onto the attachment threads. These beads lift the base from the surface of the embroidery. The threads were passed through the panel, positioned so that one end extended over the edge of the panel. The threads were tied off firmly underneath.
For the backing, fine cotton was tacked to another vilene square and the edges tucked under. To make channels to hold the linking strings, 2 strips of hemmed fabric were placed across the vilene and stitched down at regular intervals.
The backing and front panel were placed wrong sides together and the border strips were inserted between the two layers. All layers were tacked together and then hand sewn using stab stitching.
The linking strings were threaded through the channels on the back of each panel and the ends were tied off. The strings were made from strips of dish cloth machined with zig-zag stitch.
 | 23.30 |  | 23.31 |
 | 23.32 |
23.30 and 23.32 - back of the resolved sample.
Wrong Turnings!
The making and design of the resolved sample was not straight forward and the finished sample was actually a lot different from the initial design. I think the main problem was that I hadn't really thought about the design and construction properly.
I started by producing 3 samples of embroidery for each of the paper patterns in my design. By the time I got to the fourth paper I realised that I had too many different areas of pattern and that I had no idea how I could join two areas of different texture together. I decided to reduce the number of patterns and concentrate on four. I made up the four panels but when I laid them out together it was obvious that they were disjointed and mismatched. The high relief area that is now in panel 2 stood out as being much better and having more visual impact than the other embroidered interpretations. I decided to see if I could use the same gathered tuck technique to interpret the other paper designs. This proved to be possible so I unpicked the 3 samples and added the new pieces.
Here are some of the samples I produced in the process:
 | 23.33 |
 | 23.34 |
 | 23.35 |
 | 23.36 |
 | 23.37 |
 | 23.38 |
 | 23.39 |
 | 23.40 |
 | 23.41 |
 | 23.42 |
 | 23.43 |
 | 23.44 |
Costings
The resolved sample was not costly to make. I used many scraps of fabric left over from previous projects - I've given these a nominal value.
| Fine white cotton fabric | £2.15 |
| Cotton sheeting - recycled | £0.00 |
| Cotton sewing thread | £3.00 |
| Soft cotton thread | £0.33 |
| 1 skein stranded embroidery thread | £0.60 |
| 2 skeins cotton perle No. 5 thread | £1.86 |
| Cotton tape | £0.50 |
| Rayon thread | £0.88 |
| Pelmet vilene | £0.63 |
| Plastic coated wire | £0.95 |
| 2 dish cloths | £0.26 |
| Cotton tape | £0.15 |
| Beads | £0.10 |
| Various fabric scraps - nominal value | £1.00 |
| Paverpol | £0.50 |
| Total | £12.91 |
Number of hours : 95
Design Board
This is my design board

Detail view of design board
On the left hand side of the design board I placed my source images, decorated papers. I selected samples from previous chapters which were possible starting points for interpreting my design.
 |  |
 |  |
 |  |
I placed my paper on the right hand side and added my experiments and trial samples.
 |  |
 |  |
 |  |
Evaluation of Completed Work
The completed embroidered assessment piece for Module 5 is a resolved sample based on the design topic of Landscape and Texture.
How do you feel about the resulting conclusion?
I'm fairly pleased with the result in that it is very textured. I enjoyed doing it which always affects how I feel about a finished piece. I'm pleased with how I developed the high relief areas on each panel.
Is it fit for purpose - give reasons?
As a resolved sample it is fit for purpose. I'm defining the purpose as being an illustration of using various techniques to produce texture.
If you were asked to make it again, what changes would you make to the way you designed it and the way you made it?
I would give more consideration to the size and shape of the individual pieces. 3 rectangular pieces of different sizes or a square and a long rectangle might have been more interesting formats. I would also reconsider the raised areas - I think they are perhaps a bit over the top and fussy and they distract the eye from the background.
 |
